Certain LDAP clients can only receive the first 1,000 results when they make an LDAP query to Active Directory, when more results exist that satisfy the query scope. If there are 1,200 results to be returned, the client will receive the “Size Limit Exceeded” error when the paging control is not used.
Microsoft lists MaxPageSize as:
MaxPageSize – This value controls the maximum number of objects that are returned in a single search result, independent of how large each returned object is. To perform a search where the result might exceed this number of objects, the client must specify the paged search control. This is to group the returned results in groups that are no larger than the MaxPageSizevalue. To summarize, MaxPageSize controls the number of objects that are returned in a single search result.
Default value: 1,000
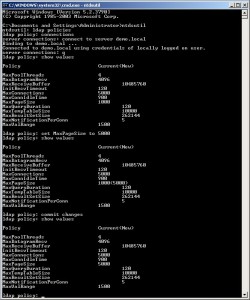
Here are the steps for showing and changing the default MaxPageSize in AD.
Microsoft Windows [Version 5.2.3790]
(C) Copyright 1985-2003 Microsoft Corp.

C:Documents and Settingsusername>ntdsutil
ntdsutil: ldap policies
ldap policy: connections
server connections: connect to server <yourservername>
Binding to <yourservername> ...
Connected to <yourservername> using credentials of locally logged on user.
server connections: q
ldap policy: show values

Policy                          Current(New)

MaxPoolThreads                  4
MaxDatagramRecv                 1024
MaxReceiveBuffer                10485760
InitRecvTimeout                 120
MaxConnections                  5000
MaxConnIdleTime                 900
MaxPageSize                     1000
MaxQueryDuration                120
MaxTempTableSize                10000
MaxResultSetSize                262144
MaxNotificationPerConn          5
MaxValRange                     0

ldap policy: set maxpagesize to 7000
ldap policy: commit changes
ldap policy: q
ntdsutil: q
No Restart is required for this settings change

